
Sieve analysis tests help classify soil on a jobsite so contractors and engineers can better gauge how it will hold up to the job they want it to do. We’ll break down what these tests are, why they matter, and how we do them here at Substrata.
All soil contains tiny grains that vary in size. The grain size helps you identify the soil type(s) you’re working with.

A sieve analysis test determines what sizes soil grains are and what percent of the soil is each size. This percentage is the particle size distribution, aka gradation. When contractors and engineers know the soil’s gradation, they can figure out how to best stabilize it to support the road or other structure they’re building.
Fun fact: Other industries also use sieve analyses for research and checking material quality—including agriculture, auto manufacturing, and aerospace.
At Substrata, we run sieve tests to help our customers see how their soil will react to our soil stabilizer, Perma-Zyme. Perma-Zyme hardens soil into a concrete-like surface that lasts longer with less maintenance.
It works with most soil types, although each reacts a little differently. Ideally, soil should contain 20% gravel or sand to make it strong enough to withstand traffic. It should also contain material that reacts well with Perma-Zyme, like clay.
The sieve analysis checks how much gravel, sand, and fine material your soil contains. Fine material includes clay (which reacts to Perma-Zyme) and silt (which doesn’t). So, we do the sieve analysis first to separate this fine material from the rest of the soil. Then, we can run an Atterberg limits test that tells us if your soil’s fine matter is clay or silt.

We follow the ASTM C136 procedure. ASTM stands for American Society for Testing & Materials, an organization that standardizes soil tests so labs across the country can deliver consistent, accurate data. C136 is the code they assigned to the sieve analysis.
This test is surprisingly simple. Here’s how it works:
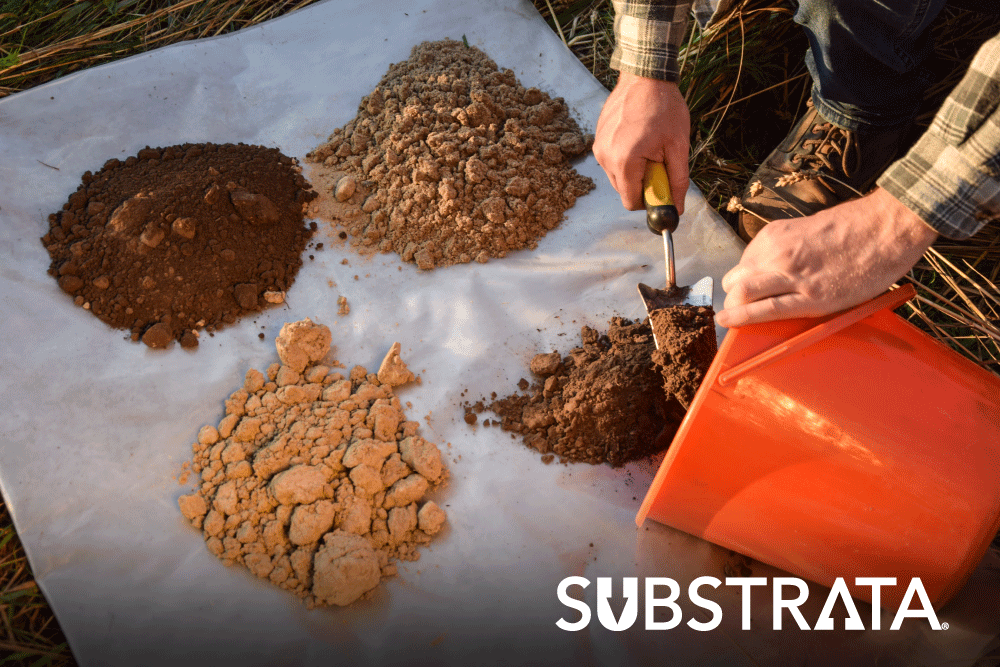
Some geotechnical firms collect soil for you. Others may ask you to collect the sample yourself. At Substrata, we provide all the supplies you need to collect the soil, and we pay the costs of shipping it to our lab.
Whether you’re partnering with us or a geotech firm, here are some tips to help you collect a good soil sample that will give you the most accurate test results.
A representative sample contains the most common soil(s) from your jobsite. That way, your results most closely match the real conditions you’re working with. A non-representative sample could mislead your lab to recommend things that won’t work for most of your project.
Most of the soil you need to stabilize is below the surface, so dig down to reach it. We recommend collecting soil from three to six inches deep, the average depth of a Perma-Zyme treatment. (For heavy industrial applications, you can dig up to a foot deep.)
How much soil you need varies. The standard is about 100 grams, or 3.5 ounces. But if you have coarse material, a few large rocks can weigh that much. Your sieve test may take as much as 70 kilograms (over 150 pounds). You may also need more soil if the firm plans to run additional tests after the sieve analysis.
A geotech firm should tell you how much soil they need you to collect. But, we like to make things even easier. We’ll give you pre-marked collection bags and a trowel—so you can just scoop in soil up to the fill line!

We dry the soil in an oven at 230°F to remove all moisture. That’s because soils like silt and clay can retain water, which makes them swell up and weigh more. As the test goes on, they’ll start to dry—losing weight and skewing the results. So, we dry them for 12 to 16 hours before we start.
Next, we take baseline measurements. We weigh the pan that we’ll use to hold the soil. Then, we put the dry soil in the pan and weigh them together so we can calculate the soil’s weight:
Combined Weight - Pan Weight = Initial Soil Weight
We weigh the sample to the nearest one-tenth of a gram and keep that number handy. We’ll use it again in step six.

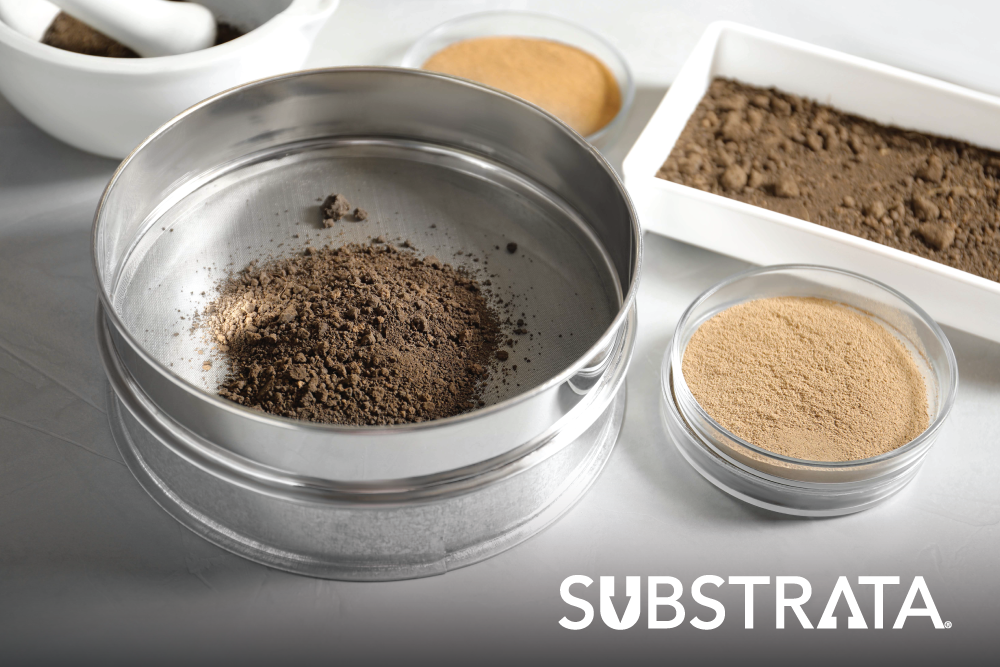
A sieve is a metal pan with a wire mesh bottom that sifts soil. The sieve catches soil particles that are too big to fit through the mesh and lets smaller particles pass through.
Sieves can be large rectangular trays or round metal pans that resemble cake pans. Lab techs choose the sieve shape and diameter based on the material they’re testing. Large gravel needs a sieve tray, while fine gravel, sand, silt, and clay can use smaller round pans. At Substrata, we test mostly fine soil with some small gravel, so we use round, eight-inch diameter sieves.

When people refer to sieve size, they don’t mean diameter. They mean the amount of space between the wires in the mesh. These spaces are called apertures.
Some apertures measure in inches, so we call the sieves by that measurement. For example, if the mesh is one inch apart, that’s a one-inch sieve. Any material less than an inch in diameter passes through and material that’s bigger stays on top. Other sieves have apertures so small that they measure in millimeters. Calling sieves by those sizes would be difficult and confusing, so the folks who make testing supplies assigned them numbers. The bigger the number, the smaller the apertures. The #4 sieve has 4.75 millimeter apertures, while the #200 sieve’s apertures are just 0.075 millimeters.
Geotech firms that test many materials may choose different sieve sizes for different samples. They may also use varying quantities of sieves. Making too big of a jump between sizes could lead to inaccurate data, but using too many sieves won’t work because the test equipment can only hold so many. The ASTM testing procedures dictate what sieves they should use.
For our tests, we use five sieves: one-inch, half-inch, #4, #60, and #200. Check out the chart below to see more sieve sizes.

We place a solid pan called a collection pan into a mechanical sieve shaker. The collection pan’s job will be to catch any material that passes through the whole sieve stack, so it won’t make a mess. Next, we stack the five sieves on top of the collection pan, with the smallest mesh on bottom and the largest mesh on top. We then clamp the sieves in place.

Placing soil in the top sieve doesn’t mean just dumping in the entire sample. Using the proper amount is imperative. Too much could trap fine particles, holding them in the wrong sieve and flawing the data. Too little may not accurately represent the soil on the jobsite. And if the geotech firm is running other tests, they may need to save some soil for those.

Exactly how much soil the lab tech uses will vary based on these factors, as well as the particle sizes we talked about earlier. For our sieve analyses, we put anywhere from 150 to 350 grams of soil into the top sieve. The reason the amount varies is that gravelly soil is heavier than fine soil, so we need to test more gravelly soil to collect accurate data.
This part’s fun... and loud! The lab technician turns on the mechanical sieve shaker. It then vibrates to help smaller particles fall through each sieve until they reach one with apertures too small to pass through.

Sieve shakers can move soil in various ways—such as side-to-side, in a circle, or up and down. At Substrata, we use the tapping method, where the machine moves side-to-side and in a circle, while a mechanism taps it to jiggle stuck particles loose. This is best for slightly cohesive soils. Some labs also use sieving aids—rubber cubes, brushes, balls, or additives like talcum—to keep soil from sticking together, but we don’t use them.
We run our machine for 15 minutes per test. Afterward, we want 1% or less of the material on each sieve to be able to fall through when we shake it for a full minute. If 99% of the material stays put, we can be reasonably certain most material in that sieve belongs there—meaning it’s sized correctly and will give us accurate data.
Fun fact: The ancient Egyptians performed primitive sieve tests, while our modern version has only been around since 1935.

There are two methods to weigh the soil from the sieves: cumulatively or individually. The results will be the same, so both options are valid. We use the individual method at Substrata, but we’ll explain how they both work.
We take the soil from each sieve and place it into separate, pre-weighed pans. It’s essential to remove all material from each sieve to get the right measurement. Missing a few grains here and there is normal, but missing too many can skew the results. Our lab techs may use a brush to free soil that’s stuck in the mesh. The soil in the collection pan can stay there—as long as the tech knows the collection pan’s weight.
We label each pan so they know which sieve the soil came from. Then, we weigh it to the nearest one-tenth of a gram to calculate that soil’s weight:
Total Weight - Pan Weight = Soil Weight
We do this for each sieve. Finally, we add all the individual soil weights together to get the total post-test soil weight, which we’ll use shortly.
In the cumulative weighing method, lab techs pour the soil from the top sieve into the pre-weighed pan from step two of the testing process. They weigh the pan and soil to the nearest one-tenth of a gram so they can calculate the soil’s weight:
Total Weight - Pan Weight = Top Sieve Soil Weight
Next, they add the soil from the second sieve to the pan and reweigh the whole thing—pan, top sieve soil, and second sieve soil. Then, they subtract the pan’s weight and top sieve soil weight to find out how much soil the second sieve caught.
The tech repeats this process for all sieves and the collector pan. The key is to always subtract the most recent previous weight from the current weight:
Current Total Weight - Previous Total Weight
= Current Sieve Soil Weight
At the end, they’ll know how much the soil from each sieve weighs and the soil’s total post-test weight.
The post-test weight is essential. We compare it to the soil sample’s initial weight from step two. If the post-test weight is within 0.3% of the initial weight, we know the test is good and we can use the data we collected. If it’s more than 0.3% different, then the tech lost too much soil during the test. They’ll need to scrap their results and start over.
We find the soil’s particle size distribution using its total post-test weight and the respective soil weights from each sieve. One sieve at a time, we plug the numbers into this equation:
Soil From Sieve Weight ÷ Total Post-Test Soil Weight
= Percent of Particles
We also do this for the collection pan. So, let’s say your soil’s post-test weight is 300 grams, and the collection pan caught 55 grams of soil.

We’d plug that into the equation like this:
55 Grams ÷ 300 Grams = 18% of Particles
Now we know that your soil contains approximately 18% fine material that can pass the #200 sieve, which is either clay or silt. So, we’re ready to run an Atterberg limits test to find out which one it is and how it’ll react to Perma-Zyme.
This is the most important step because your results will help you decide how to stabilize your soil for years to come. Every geotechnical firm shares test results with their customers, and so do we! We’ll provide a written sieve analysis report and meet with you to go over it. We’ll cover:
Of course, sieve tests are just one part of the soil evaluations we do to help you make the most of Perma-Zyme. We’ll also perform an Atterberg test and a Perma-Zyme trial—that way, you’ll have the information you need to make your project successful.


No Comments Yet
Let us know what you think